Introduction
Imagine the smell of fresh bread in your kitchen. The golden crust and soft inside are just for you. Baking sourdough bread is a joy that starts with a healthy starter. The sourdough float test helps you know when your starter is ready.
We’ll show you how to do the sourdough float test. This ensures your starter is ready to go. Knowing when to test can make your bread light and fluffy. Let’s start our sourdough adventure together, one float at a time.
Understanding the Sourdough Float Test
The sourdough float test is a handy tool for bakers. It helps check if your sourdough starter is ready. By seeing if the starter floats in water, you learn about its leavening power. This is key for making great bread.
This simple test gives you a peek into your starter’s health. It makes your sourdough baking process better.
What is the Sourdough Float Test?
The sourdough float test is easy. Just drop some starter into a cup of water. If it floats, it means the starter is active and ready for baking.
This test works best after feeding the starter 6 to 12 hours before. This lets it grow and show its activity.
Why Use the Float Test?
The float test is more than just a readiness check. It’s a quick way to see if your starter is healthy. Signs of a healthy starter include:
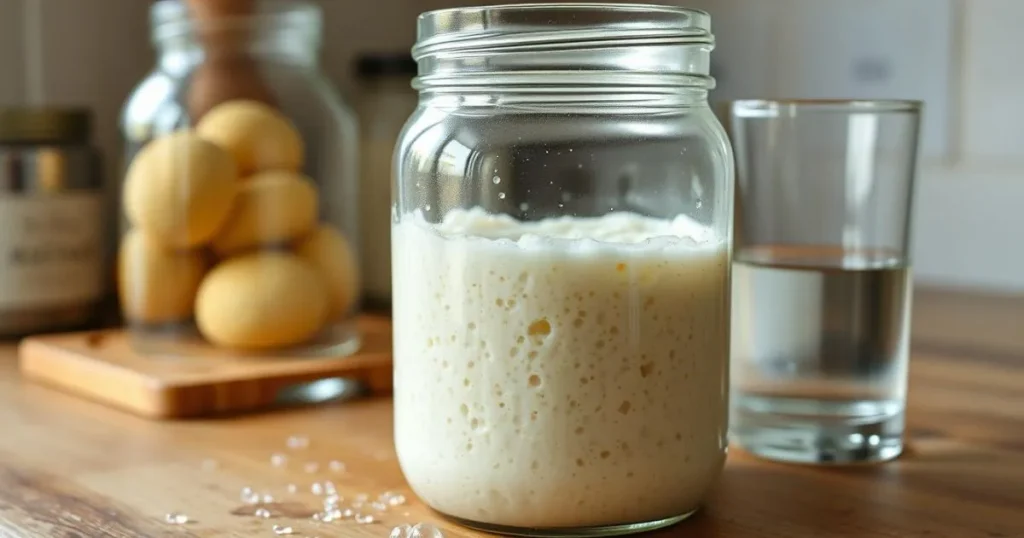
- Doubled or tripled volume
- Visible bubbles and a jiggly texture
- A pleasant yeast-like aroma
But, the float test isn’t always perfect. Things like starter type and flour can mess with the results. Knowing your starter well helps you bake better.
Preparing to Perform the Float Test
Before you do the sourdough float test, getting ready is crucial. You need to know the materials for float test and how to collect the sample right. This will help you get the best results.
Gathering Your Materials
You’ll need a few key things for the float test. Make sure you have:
- A glass of room-temperature water
- Your active sourdough starter
- A spoon for collecting the sample
- A small bowl for any excess starter
Using a clear glass is important. It lets you see if your starter floats or sinks. This shows if it’s ready for baking. Also, feed your starter 6 to 12 hours before testing for better results.
Tips for Sample Collection
When you learn how to collect sourdough starter, be gentle. The bubbles are key for the test. Here’s how to do it:
- Use a clean spoon to scoop out a small amount of starter.
- Gently place the sample in the glass of water.
- See if it floats—this means your starter is probably ready.
Keeping the right conditions while collecting helps make the test more reliable. Tools like weighing scales or fermentation jars can also help. By following these tips, you’ll get the most accurate reading on your sourdough starter’s activity.
How to Perform the Sourdough Float Test
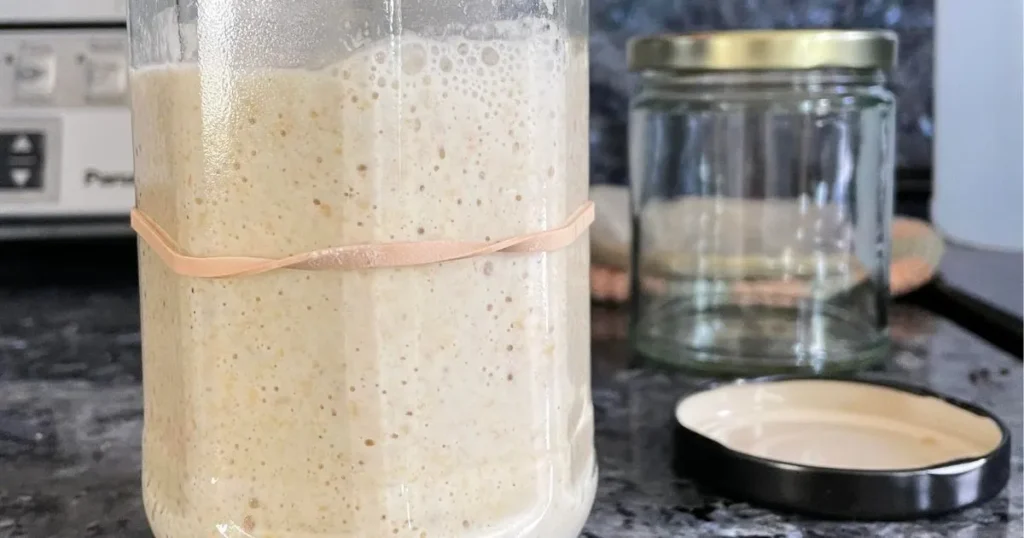
The sourdough float test is a simple way to check if your starter is ready. It’s important to follow the right steps for accurate results. Make sure your starter is active, usually 4-6 hours after feeding. The right conditions are key to success.https://www.sourdoughvoyage.com/breads/
Step-by-Step Instructions
- Start by taking about 1 tablespoon of your sourdough starter.
- Then, gently drop it into a glass of room temperature water.
- Watch if the starter floats or sinks.
- If it floats, it’s ready for baking.
- If it sinks, it needs more time or feedings.
Ideal Conditions for Testing
To get the most accurate results, follow the best testing conditions. Your starter should be at its most active, about 4-6 hours after feeding. Keep these tips in mind:
- Keep the environment warm, around 75-80°F (24-27°C), for better fermentation.
- Use filtered or chlorine-free water to avoid harming the starter.
- Test in a glass with a loose lid to help the starter grow.

Interpreting the Results of the Float Test
Knowing what the float test shows about your sourdough starter is key for great baking. This test is helpful but should be seen with other sourdough starter health indicators. A starter that floats up shows it’s active. But if it sinks, it might need more time or food.
Understanding Float vs. Sink
A healthy starter will float on water during the float test. This means it’s ready for baking. If it sinks, it needs more time or food to be ready. What does float mean here? It shows the starter has enough gas for the bread to rise.
Indicators of Starter Health
Watch for more signs of your starter’s health besides the float test. Look for:
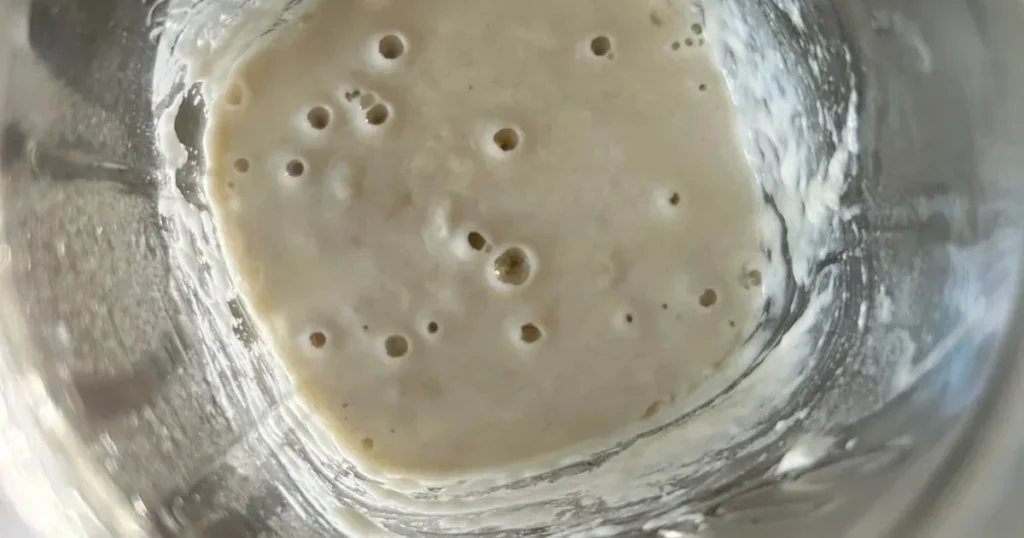
- Visible bubbles, which show active fermentation.
- An increase in size, meaning the yeast is doing well.
- A nice smell, showing healthy fermentation.
- An airy texture, which means it’s producing gas right.
These sourdough starter health indicators give you more insight than just the float test. Keeping a regular feeding schedule and proper storage helps your starter stay healthy and effective in your baking.
Factors Affecting the Accuracy of the Float Test
The sourdough float test is a handy way to check if your starter is ready. But, many factors affecting float test accuracy can lead to wrong results. These mistakes can mess up your baking if you don’t understand them.https://www.sourdoughvoyage.com/50-creative-recipes-using-sourdough-bread-and-starter/
Common Causes of False Negatives
There are several reasons for float test failure that can give you false negatives. A young starter might not be strong enough, causing it to sink. Also, handling the starter wrong can burst the gas bubbles.
The quality of your feeding schedule and the room temperature also play big roles. Make sure your starter doubles in size in 3-4 hours after feeding for the best results.
Influence of Flour Types on Results
The flour you use can greatly impact your sourdough. Whole grain flours like whole wheat or rye can trap gases differently than all-purpose flour. This can change how your starter floats in the test.
Choosing a flour that matches your starter’s hydration level is key. Trying out different flours can give you different results. So, it’s important to watch how your starter reacts based on the flour you use.
| Flour Type | Characteristics | Float Test Result Influence |
|---|---|---|
| Whole Wheat | Higher protein, more nutrients | Potentially denser starter |
| All-Purpose | Balanced protein content | Consistent gas trapping |
| Rye | High enzyme activity | Can create a more acidic environment |
| Einkorn | Lower gluten content | May lead to inconsistent bubbling |
Alternatives to the Sourdough Float Test
The float test is a common way to check if your sourdough starter is ready. But, there are other signs to look for too. By watching how your starter looks, smells, and feels, you can tell if it’s ready to bake. These signs include how much it grows, its smell, and its texture.
Other Readiness Indicators
Many bakers use different signs to check their sourdough starter’s health. Some of the best signs are:
- Volume Increase: A healthy starter grows to double its size in 4 to 6 hours after feeding.
- Bubbles: Seeing bubbles means the starter is actively fermenting and has yeast.
- Texture: It should feel thick, like thick pancake batter.
- Aroma: A nice, tangy smell shows the starter is well fermented.
Combining Methods for Better Accuracy
Using more than one method can make your baking prep more accurate. Mixing volume checks with the float test helps avoid mistakes. Here’s how to mix these methods for better results:
| Method | Indicators | Advantages |
|---|---|---|
| Float Test | Floating capability | Simplifies readiness check |
| Volume Measurement | Doubling in size | Provides time-sensitive feedback |
| Visual Inspection | Bubbles and texture | Immediate observation without testing tools |
| Aromatic Assessment | Smell after feeding | Informs about fermentation quality |
Maintaining a Healthy Sourdough Starter
To keep your sourdough starter thriving, follow a regular feeding schedule and ensure the right conditions. A consistent routine will keep your starter lively and full of flavor.
Feeding Ratios and Schedules
Using the right ratios is key to a healthy starter. A 1:1:1 ratio of starter to flour to water is a good start. For quicker rises, try a 1:2:2 or 1:3:3 ratio. Always discard half of the starter to keep it the right size.
Tips for Consistent Starter Activity
Watching your starter’s activity is important. Here are some tips to help:
- Feed your starter at least three times a week to keep it active.
- Use filtered or distilled water to avoid chlorine, which can slow growth.
- Look for bubbles and expansion to know when it’s ready to use.
Adjusting Environment for Optimal Rise
Improving your starter’s environment can make a big difference. Keep it at about 75°F (23°C) for best results. For extra warmth, try an oven with the light on or a warm towel. Notice how its smell changes from sweet to sour as it ferments.
| Feeding Schedule | Ratio (Starter:Flour:Water) | Expected Results |
|---|---|---|
| Daily Feeding | 1:1:1 | Active starter, ready for baking within 3-5 hours |
| Twice a week | 1:2:2 | Moderate rise, still suitable for baking |
| Weekly Maintenance | 1:4:4 | Slower growth, may need longer to rise |
By paying attention to your sourdough’s feeding and environment, you’ll have a reliable starter. It will make your baking even better.
Common Issues and Troubleshooting
Knowing why the float test might not work right is key to a healthy sourdough starter. Many bakers face common sourdough problems that can mess up the test. Things like not feeding the starter enough, bad environment, or a starter that’s not ready can cause issues. By spotting these, you can fix the sourdough float test problems.
When the Float Test May Fail
The float test can sometimes be tricky. If you get unexpected results, check these things:
- Underfeeding: Not enough food can slow down yeast, making bubbles hard to form.
- Temperature: Keeping your starter too hot or cold can slow down fermentation.
- Starter Maturity: Testing a young starter might not give reliable results, as it’s not strong enough.
Identifying and Resolving Starter Problems
Watching your starter closely can help spot problems early. Here are some tips for fixing common starter issues:
- Change your feeding to a 1:5:5 ratio of white flour, whole-grain rye flour, and water.
- Make sure your starter stays in the best temperature range for better fermentation.
- Watch for mold or spoilage and adjust feeding to get it going again.
- Pay attention to how it rises and smells, as these show its health.
Conclusion
Mastering sourdough means knowing how to use the sourdough float test. This sourdough baking summary shows how important it is to watch and feed your starter regularly. Doing this will help you get great results every time you bake.
The sourdough float test is very important. It tells you if your starter is healthy and ready to use. With a good routine of feedings and adjustments, you can make beautiful, tasty loaves.
As you get better, your hard work will pay off. You’ll make loaves that look good and taste even better. Enjoy the journey of mastering sourdough and the joy of making great bread at home.
FAQ
What is the purpose of the sourdough float test?
The sourdough float test checks if your starter is ready for baking. It shows if the starter has enough bubbles to make your bread rise.
How can I tell if my sourdough starter is healthy?http://healthy
A healthy starter doubles in size after feeding, has bubbles, smells good, and feels light. The float test also shows its health.
When is the best time to perform the sourdough float test?
Do the float test 4-6 hours after feeding. This is when it’s most active and ready to rise.
What should I use to collect a sample for the float test?
Use a clean spoon to scoop a small starter sample. Try not to disturb the bubbles for accurate results.
What if my sourdough starter sinks during the float test?
If it sinks, it might need more time to ferment or more feeding. This helps it get stronger and more active.
Can the type of flour I use affect my float test results?
Yes, flour type can change float test results. Whole grain flours trap gases differently than all-purpose flour, affecting rise.
What other indicators can I look for to assess my starter’s readiness?
Look for volume increases, bubbles, a nice smell, and an airy texture. These signs confirm your starter is ready for baking.
What should I do if my float test results are inconsistent?
If results vary, try adjusting feeding, keeping it warm, and check the environment before testing.
How often should I feed my sourdough starter?
Feed it regularly, using ratios like 1:1:1 for quick rises or 1:4:4 for slower ones. Choose based on your baking needs.
What environmental factors can affect my sourdough starter’s performance?
Temperature and humidity greatly affect your starter. Keep it warm and away from direct sunlight for best fermentation and rise.

4 thoughts on “How to Perform the Sourdough Float Test”
Comments are closed.